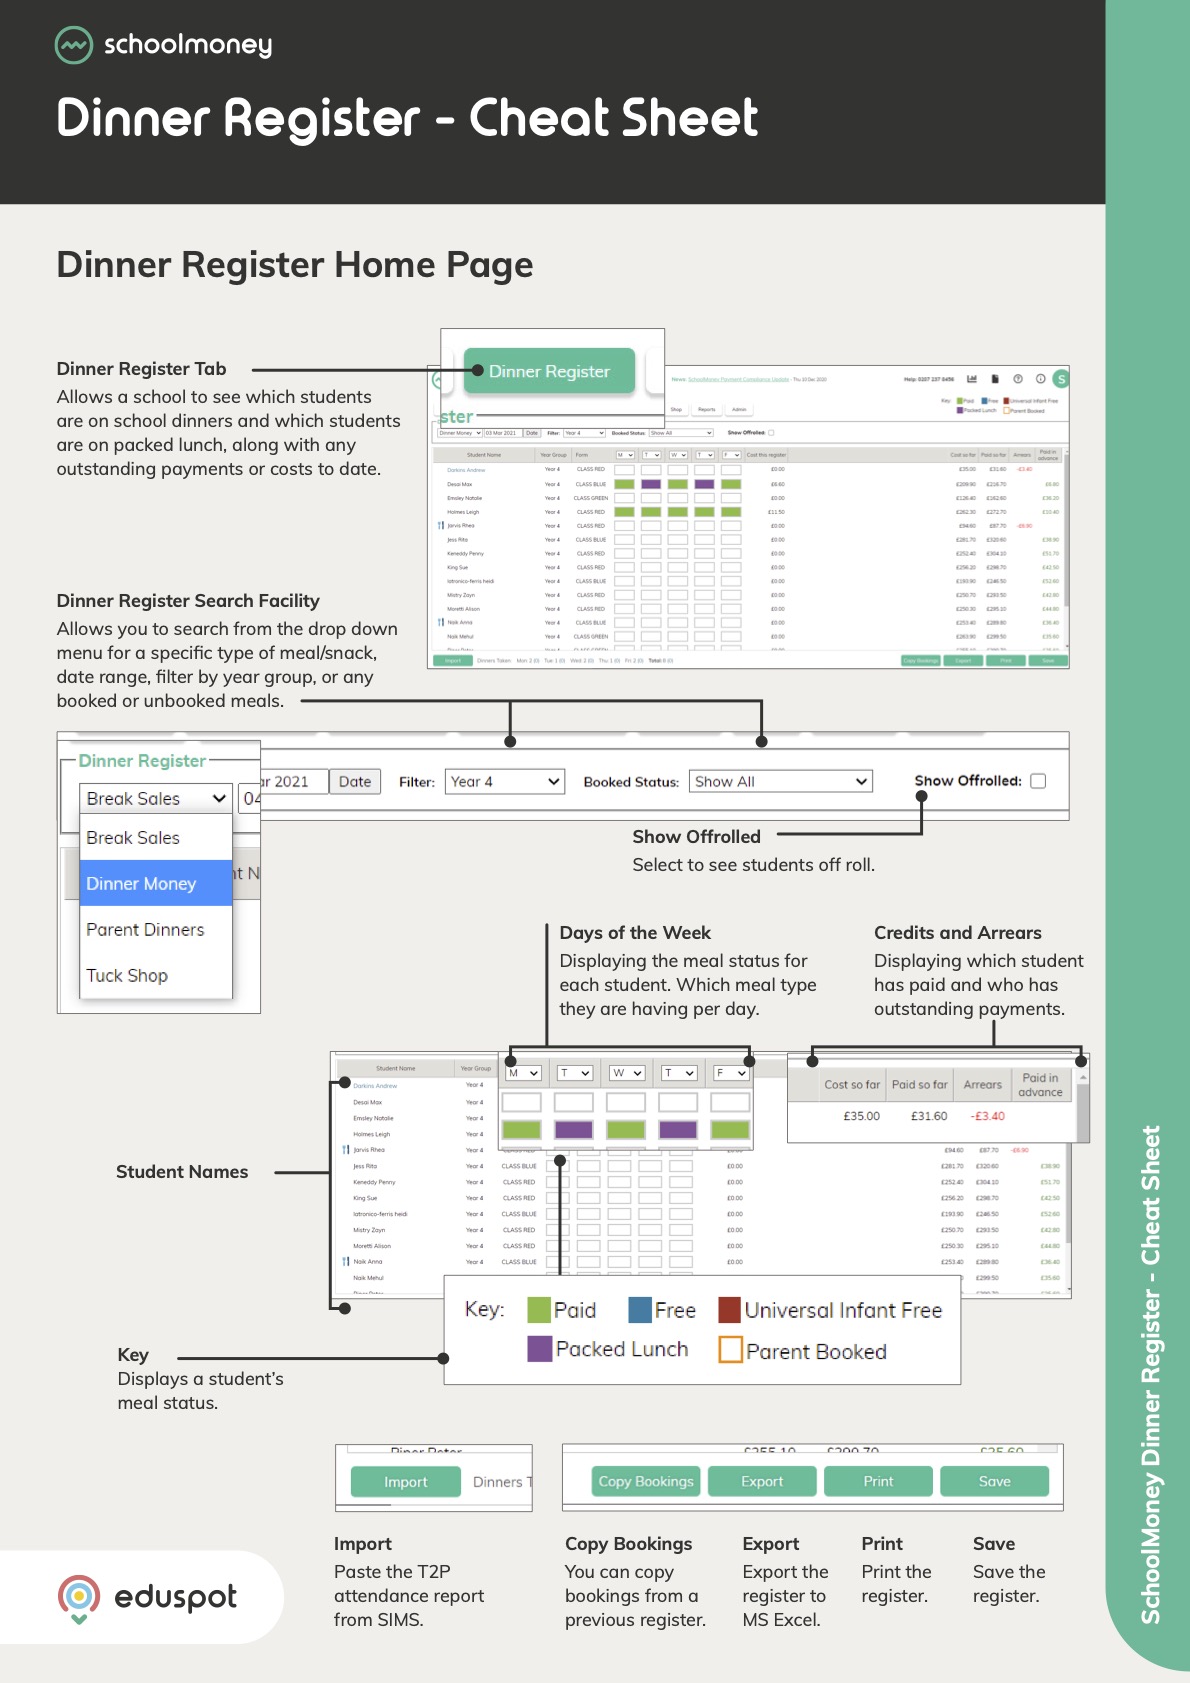
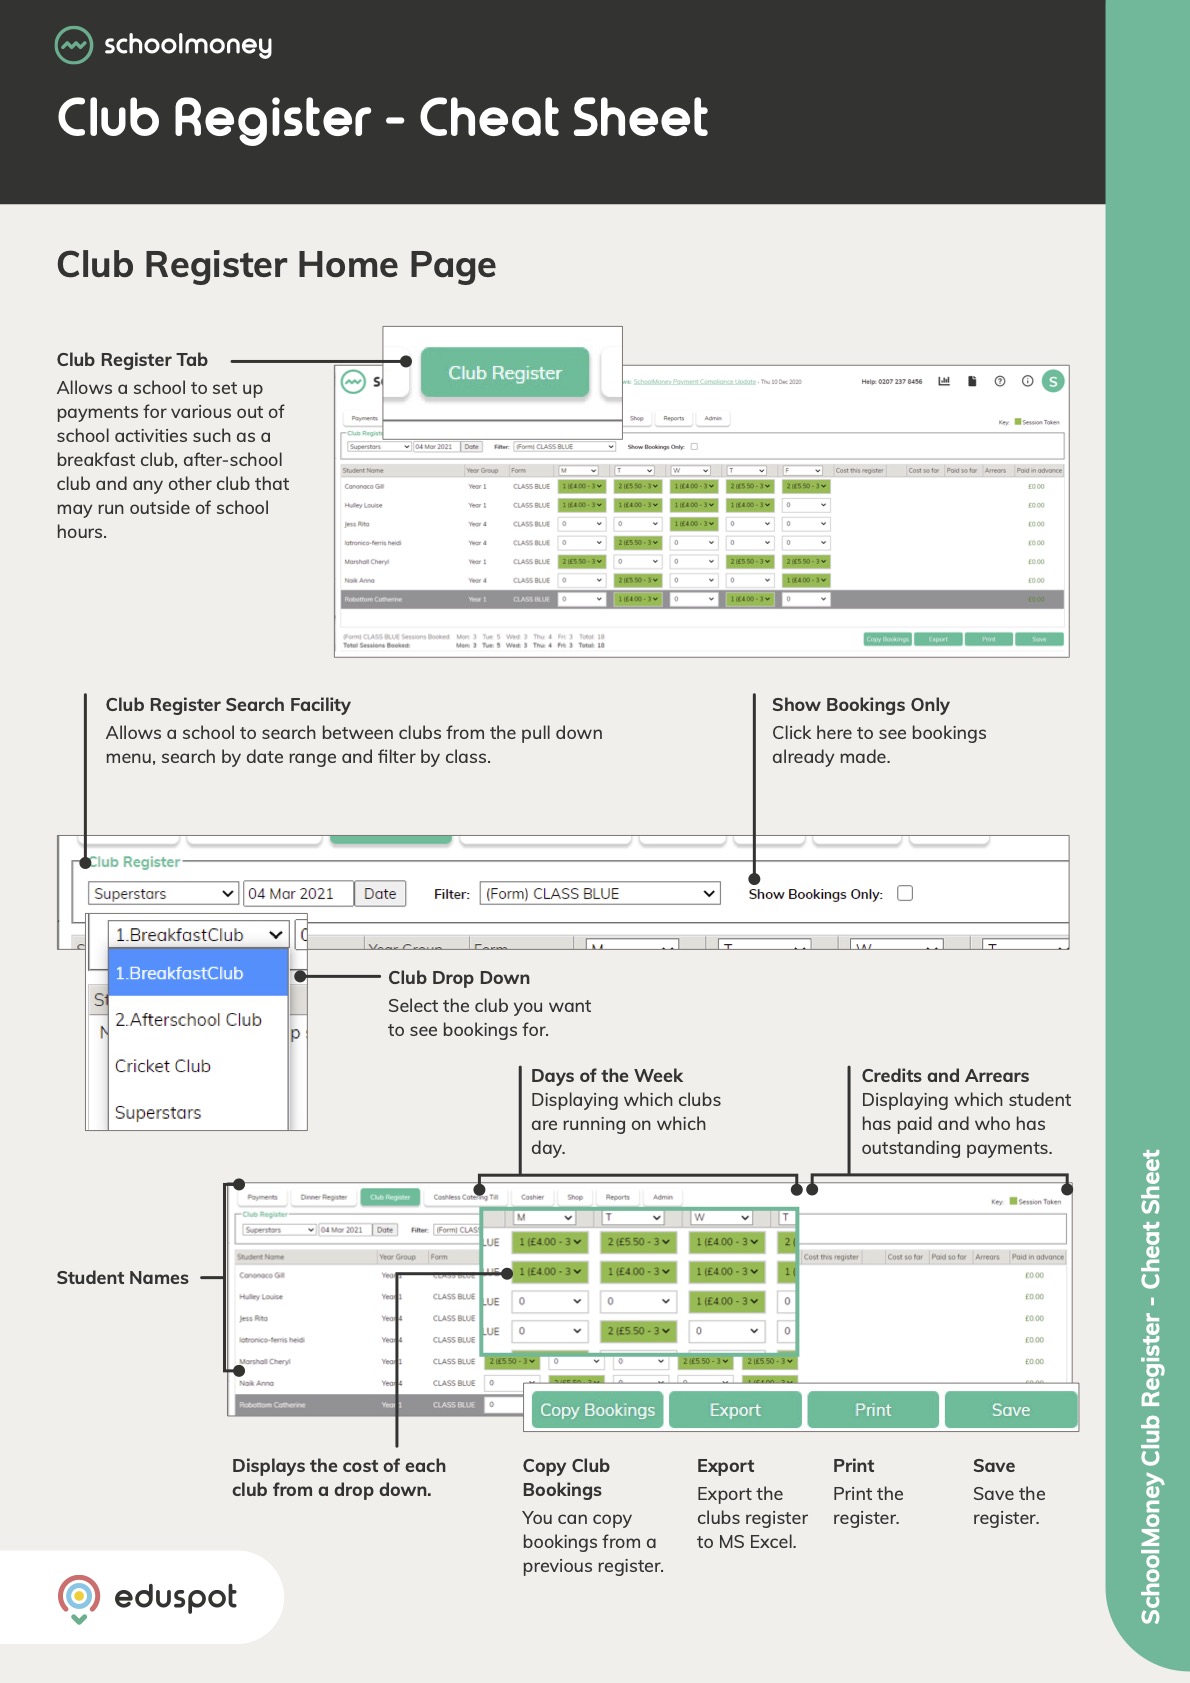
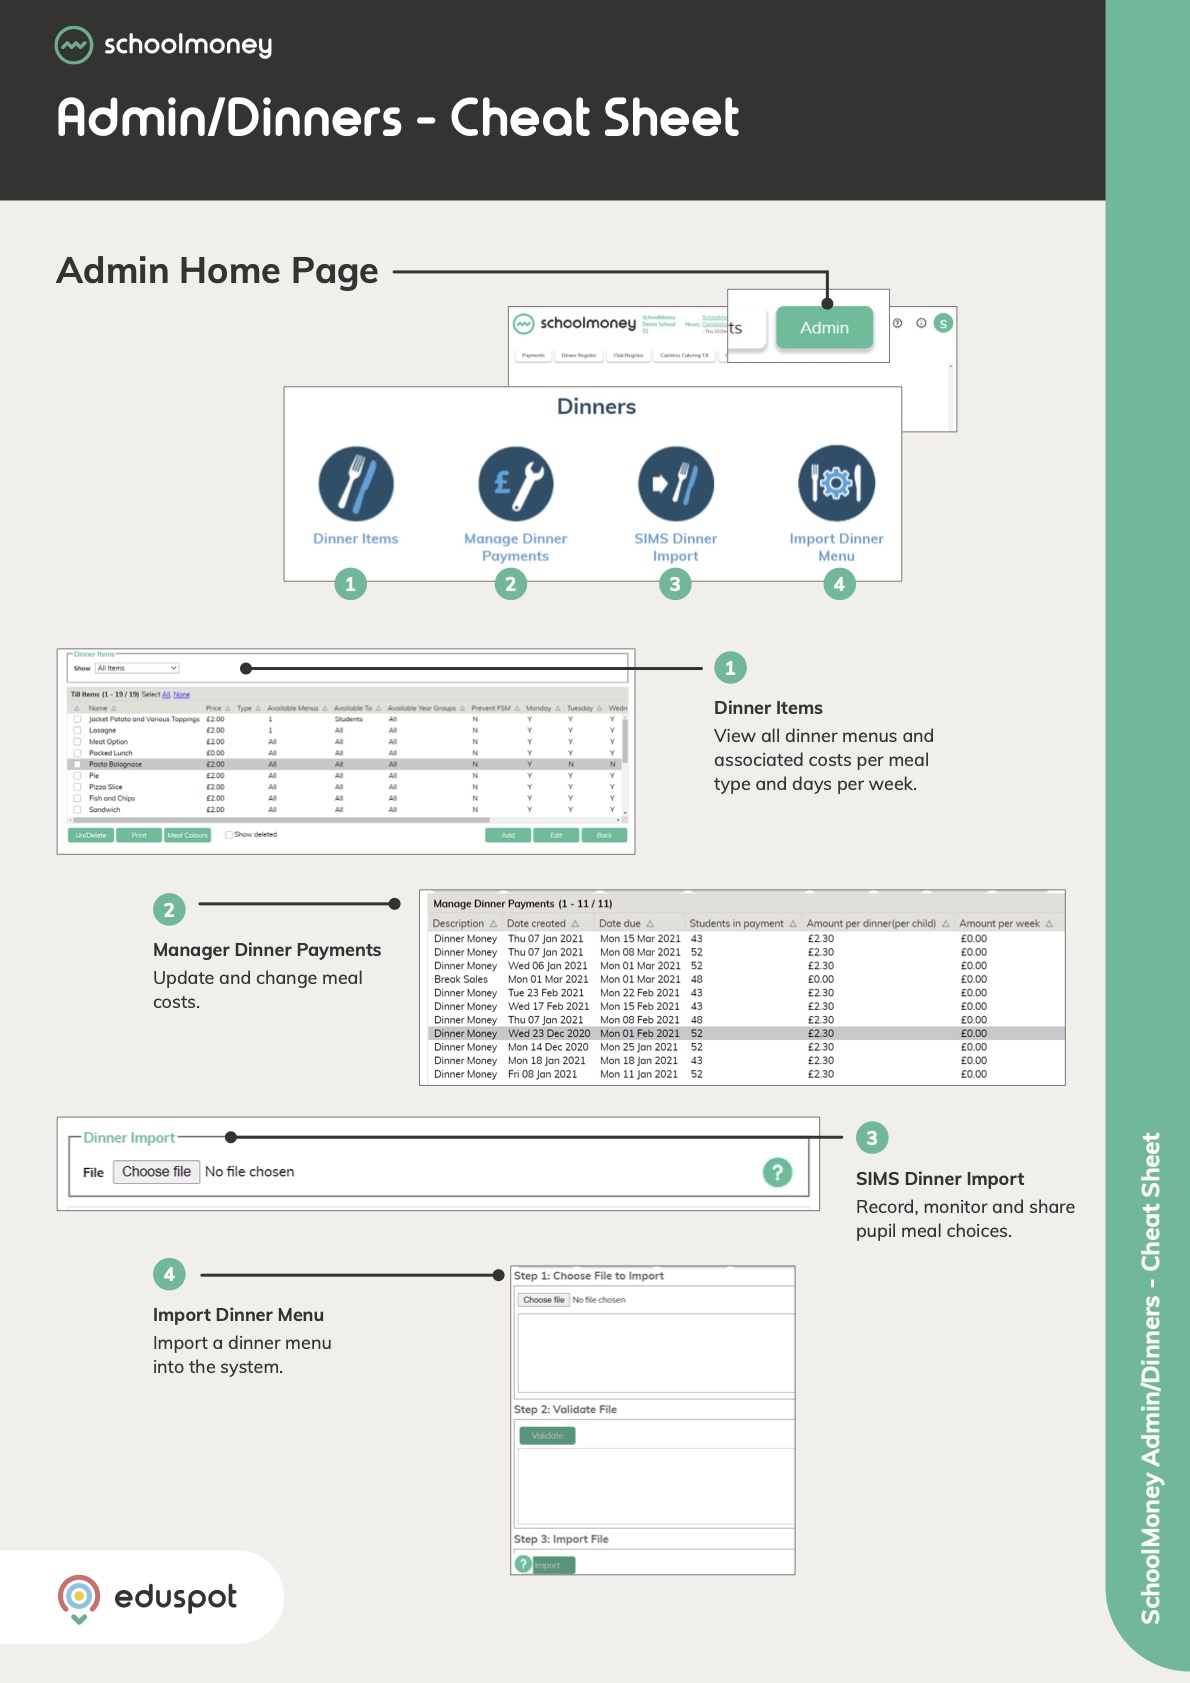
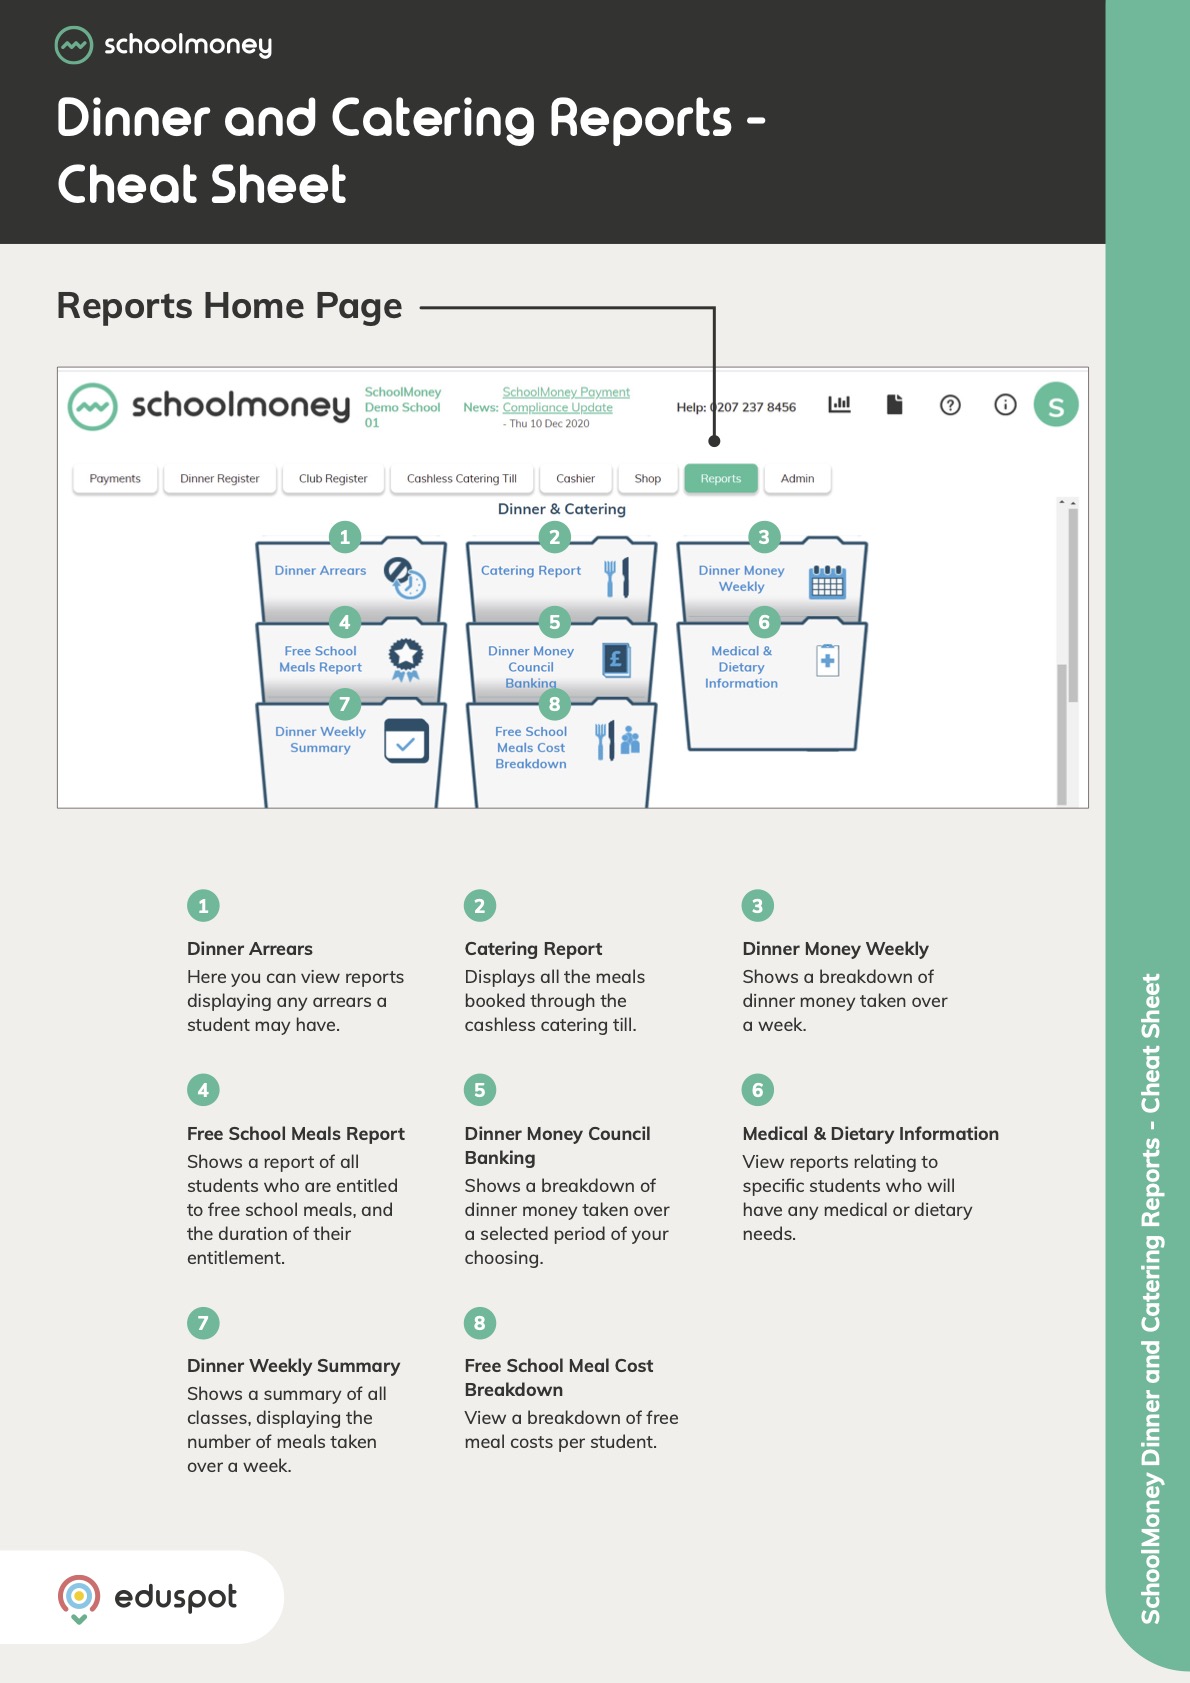
Scope
- Steps on how to create a Shop Item.
- You must have first have the school’s bank account details setup in SchoolMoney. Click here for our guide: SchoolMoney: Setup new Bank Details & BACS References.
Instructions
1. Go to the Shop tab from the top.
2. Click the Add button in the bottom right corner.
1. Go to the Shop tab from the top.
2. Click the Add button in the bottom right corner.
3. From the Add Shop Item pop-up box that will appear on screen, fill in the following details:
- Item name – The name of the item you are adding e.g. Jumper Size Small.
- Account – Select the bank account you wish to receive payments into for this item.
- Price – Cost of the item.
- Quantity – Enter the quantity of this item that you have in stock (if you do not keep track of your stock, we recommend entering a high quantity to cover the items that may be paid for). When parents purchase shop items, the quantity automatically adjusts to reflect that purchase.
- Allow Quantity to be negative – If this is ticked, parents will still be able to make purchases, even when the stock level (Quantity) is passed.
- Stock Alert Level – Once the stock level reaches this number, you will be sent an email to notify you.
- Description – Add any extra information as needed. This is for school use only.
- Available – If this is ticked the parents will be able to see the item. If it is un-ticked, they will not be able to see the item.
4. Once you have entered the details, click Save.