Scope
- Steps on how to assign a colour key to various Dinner Items.
- The Colour Selections feature allows you to see at a glance which pupils have selected which types of dinner items, coded by colour.
1. The first step is to select and label your colours. Navigate to the Admin tab from the top.
2. Scroll to the bottom and click on Dinner Items.

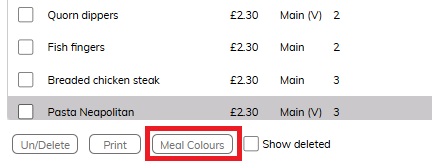
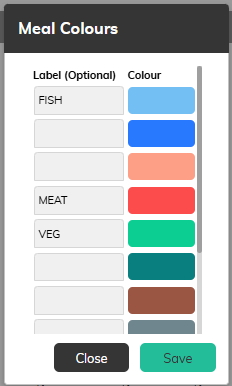
3. In the bottom left corner of this screen, click on Meal Colours. This will bring up a list of text boxes and colours.

4. From here, add the relevant meal type by typing in the Label field next to the adjacent colour, e.g.:
- Red – Meat
- Green – Veg
- Yellow – Jacket Potato
- Blue – Fish

5. With the colours labelled, the next step is to assign a colour to each menu item. You will have to assign a meal colour to each item, one at a time.
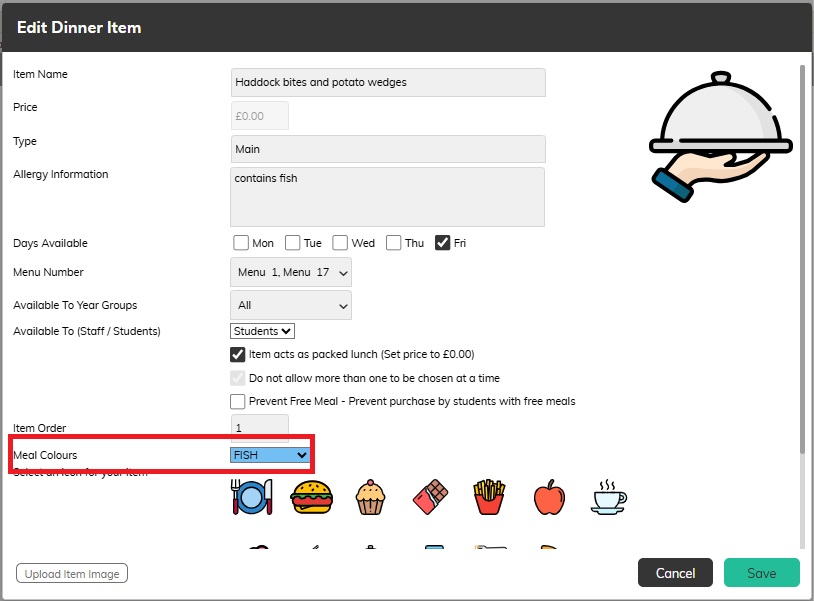
6. Go to Admin and Dinner Items, then double-click on a meal item.
7. From the Edit Dinner Item pop-up box, go to the Meal Colours field > click on the drop-down menu > select the correct colour/meal type. Click Save from the bottom right.

8. Repeat the above instructions for all other meal’s items in your list.
Instructions – How to use the Colour Selections
1. Go to the Cashless Catering Till tab from the top. Click Colour Selection from the bottom right corner.

2. This will bring up a list of Year and Form groups on left side of the panel at the top, and a list of the Colour Selections you have created on the right side.
3. Click on the Year and Form group you would like to see the information for in the top left.

4. On the right, you can filter to show only one meal type by clicking on the meal type, which will highlight the box. You can also select multiple meal types to filter by.


