
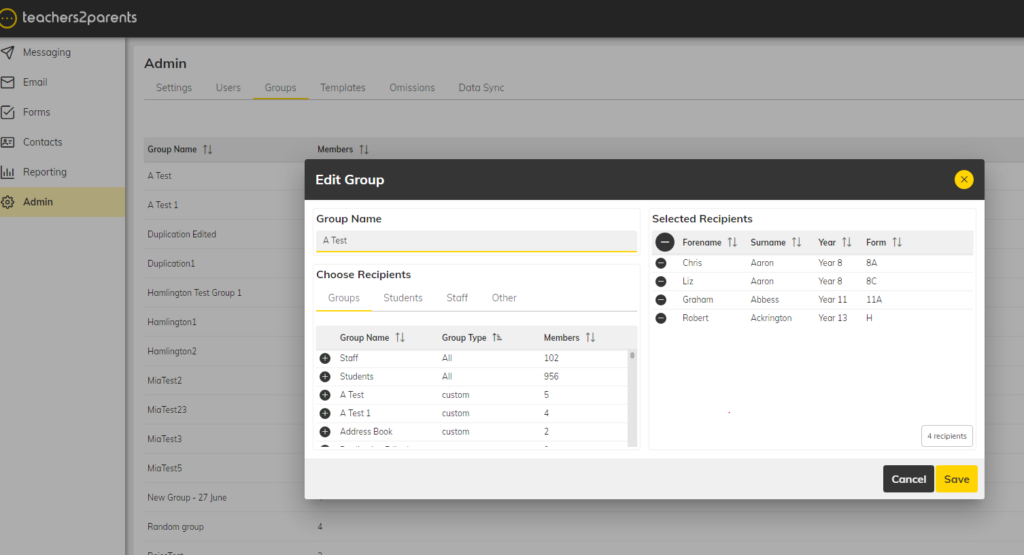
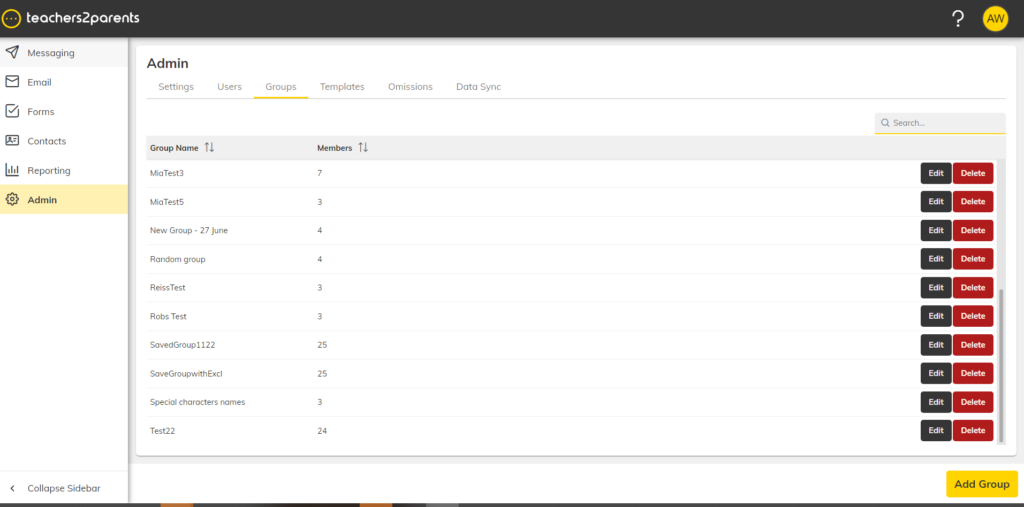
The user is to access the Admin area, found in the navigation pane, and select the group they are wanting to add members to, edit or delete.

Select Edit and a pop up with the group members will appear on screen.
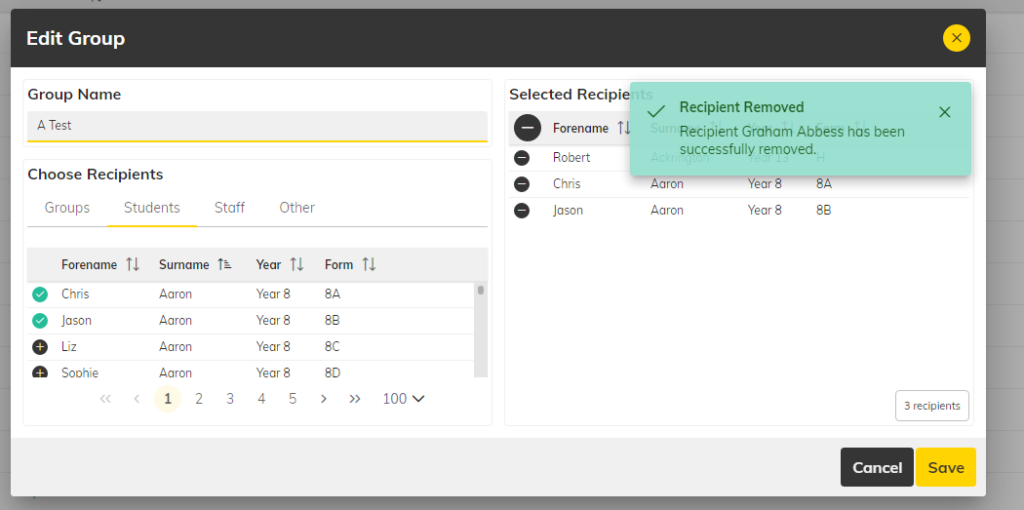
To remove members in the group, use the minus icon.
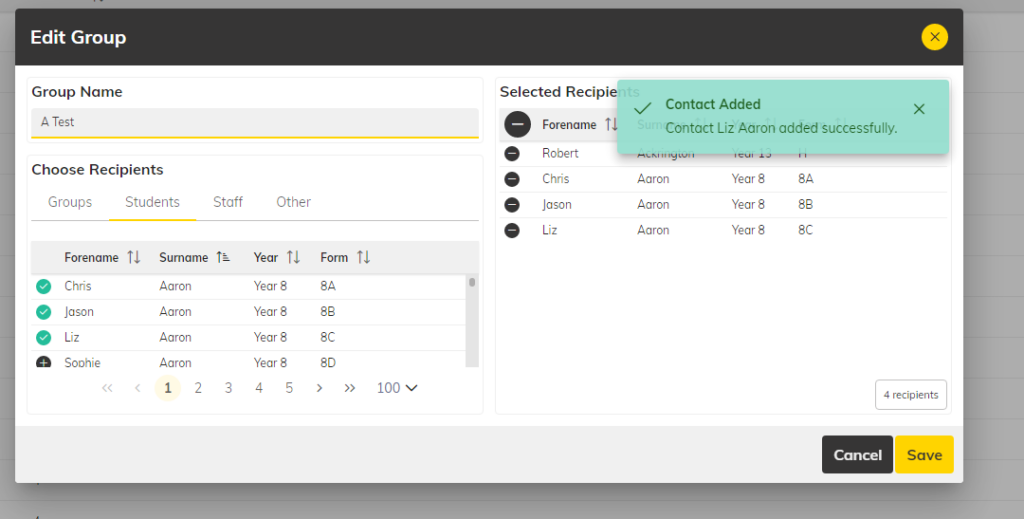
To add members to the group, navigate to the recipients of the user view and press the plus icon against the new group member.
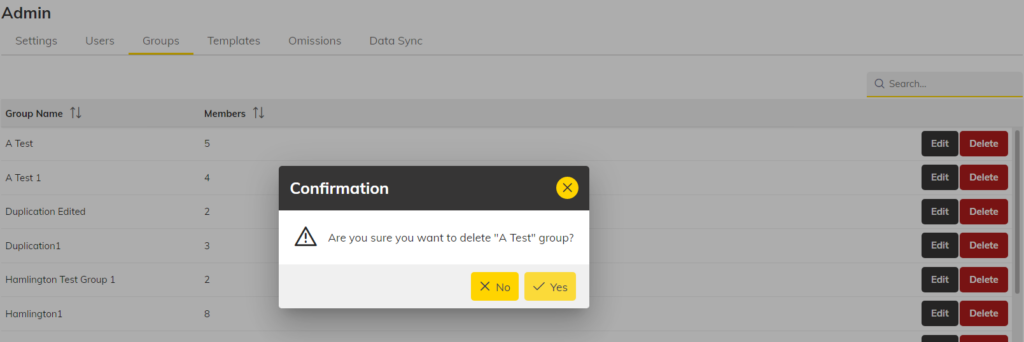
To delete a group: select the red Delete button on the right-hand side of the screen view. Once ‘yes’ has been chosen, the group is removed from group records.
To add new groups: select the yellow button at the bottom right of the user’s screen.
Alternatively, when in the Email or Messaging views, you are able to create groups and add members before sending a communication. Add group members by selecting the plus icon in the Choose Recipients section, and once selected, the members will appear in the Selected Recipients section.
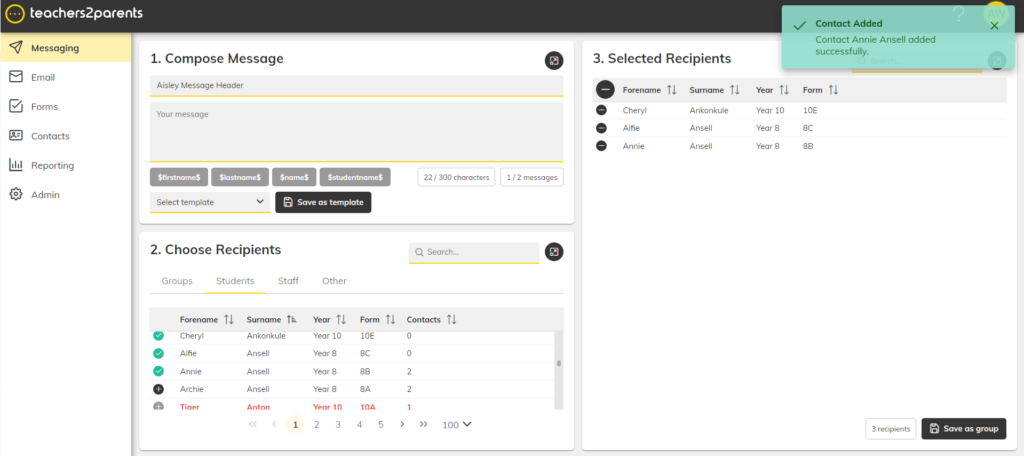
To save, please select the black Save as group button on the bottom right-hand side of the user’s screen. The Teachers2Parent system will ask for a group name. Once the ‘enter group name’ field is complete, press save.
